Have you noticed the new style comment box on WordPress?
In line with the Block editor, WordPress has rolled out a new cool comment box on most WordPress blogs. While I’m writing this post, I still see a few blogs with the old-style comments box, but I’m confident all WordPress blogs will soon display the block-style comment box.
The new style comments box appears on blog posts, but not when you add your comment via the comments box on the WordPress Reader.

For the purpose of this post, I’m using an iMac desktop computer.
Here is a breakdown of what users can do when leaving comments on blogs with the new block-style comment box.
What does it look like?
This is what the new style comment box looks like.

It looks very simple, doesn’t it? And it is very easy to use. Your Gravatar image appears in the bottom left corner.
The comments box looks like this as soon you click in the box.

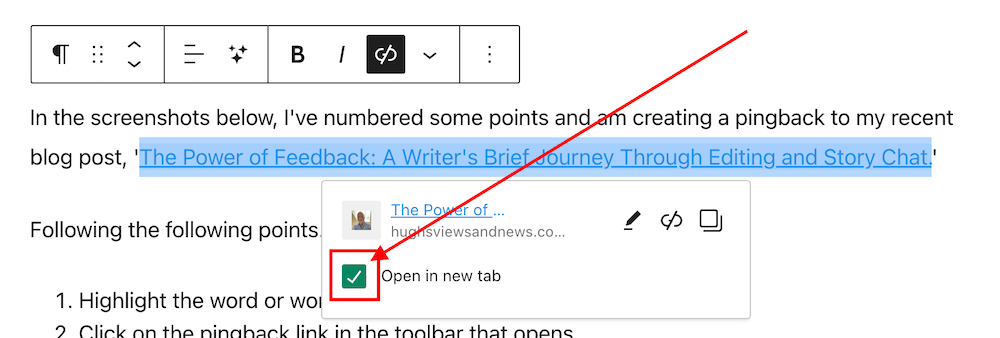
Notice the difference? A toolbar has opened along the top, and an ‘+‘ icon has appeared inside the comments box. Let’s examine what they do. I’ve numbered some icons in the following image.

- Block being used.
- Aline text
- Bold
- Italic
- Pingback link
1 – This is the type of block being used when commenting. It will always be the Paragraph block by default, but you can switch to the List or Quote block by clicking on it. If you change it to the List or Quote block, a new toolbar will appear.
2 – Use this icon to align text to the left, right or centre.
3 – Use this icon to make the text bold.
4 – Use this icon to make the text italic.
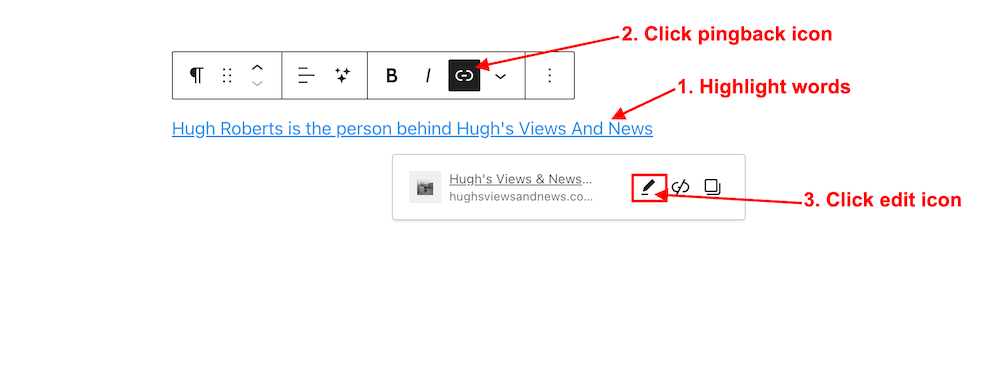
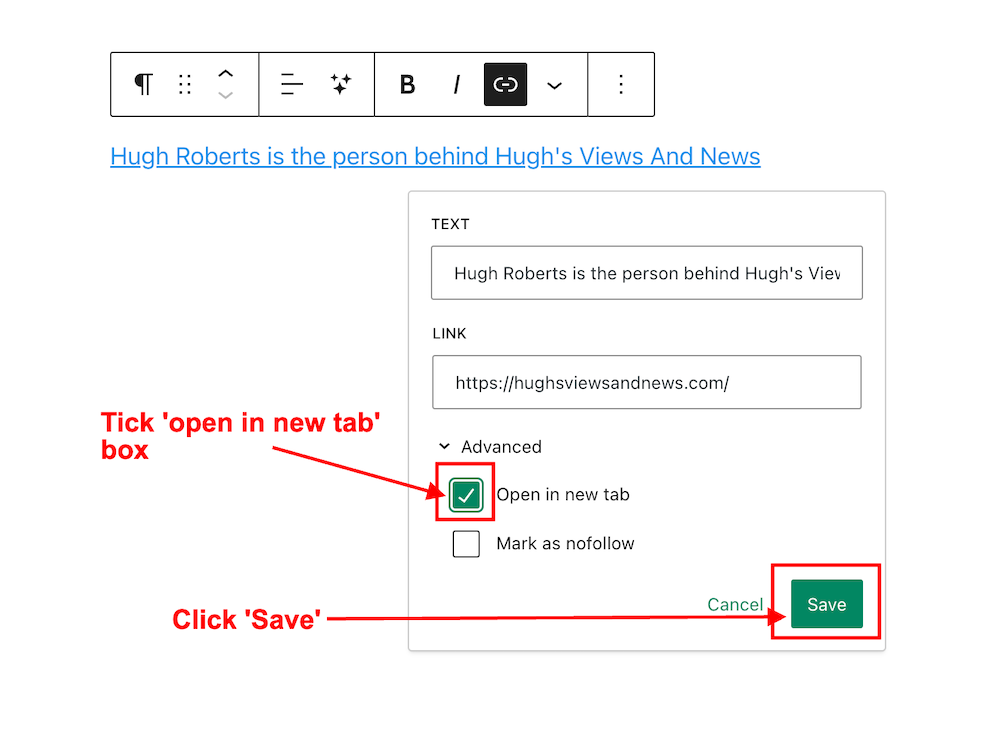
5 – Use this icon to create a pingback.
Most readers only use text when leaving comments and they will never feel the need to align it or make it bold. However, many bloggers want more.
You can now insert other blocks into the comments box by clicking the ‘+‘ icon. For example, you can now easily insert an image in your comment by clicking the ‘+‘ icon and choosing the Image block.

How cool is that? (not the photo of me, but the fact that I can add an image to the comments). This is especially good for participating in photography challenges without creating a blog post or when explaining something where including an image or screenshot helps.
I want to mention that you can create pingbacks in your comments. Pingbacks are powerful and can help boost visitors to your blog. We could already add pingbacks when using the Classic view on our blog’s dashboard but we can now finally do it using the Default view.

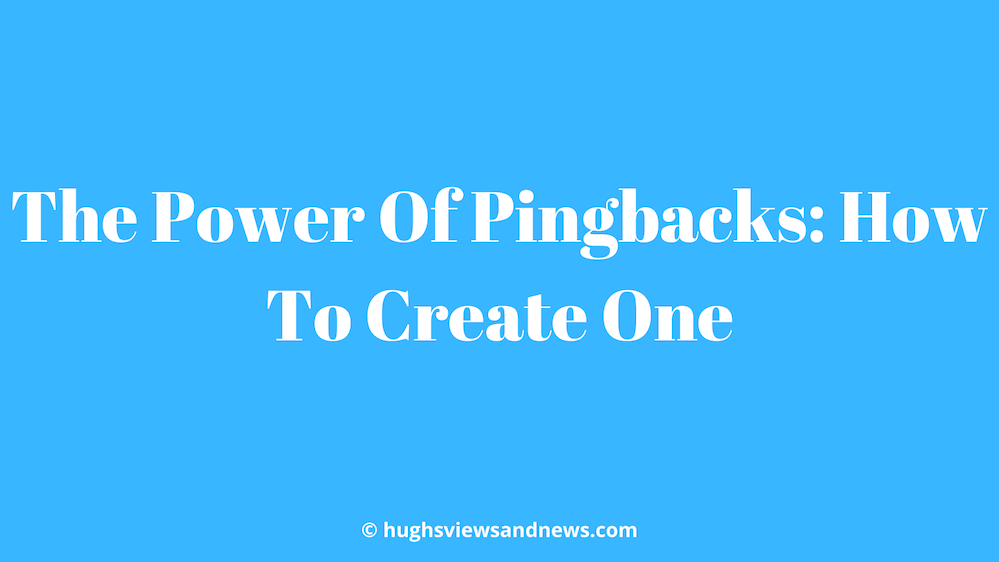
Are you unsure how to create a pingback? My post, The Power Of Pingbacks: How To Create One, provides full details.
Before submitting your comment, remember to click the small settings cog next to your Gravatar photo to open a new menu. Why?
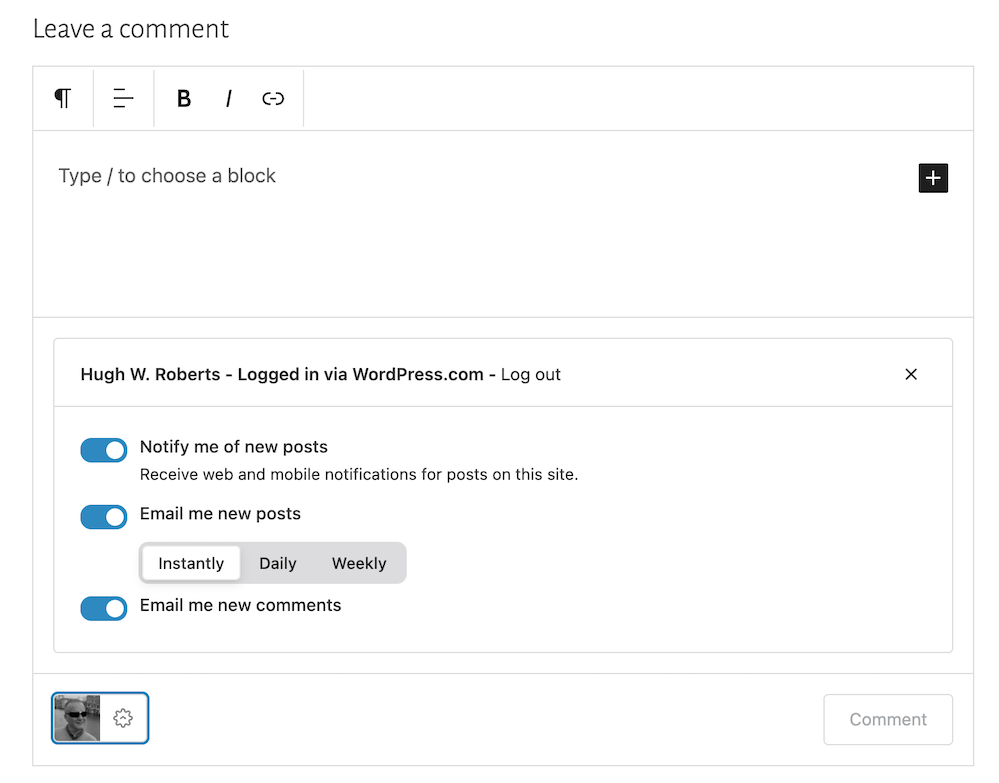
Not only will the menu that opens confirm if you are logged into WordPress, but you can also sign up to receive web and mobile notifications for posts on the blog you are leaving your comment on, get email notifications of new posts, and receive email notifications of any new comments left on the post (including a response to your comment from the blog host).
Press the ‘Comment‘ box to submit your comment.
Is this true?
I’ve heard that some bloggers are threatening to stop leaving comments or are thinking of leaving WordPress because of the introduction of the new block-style comment box.
Given that the bare minimum somebody has to do to leave a comment is to type their comment into the box, I find it hard to believe that people are threatening to stop leaving comments or leaving WordPress because of the introduction of this new comments box. If you are, please reconsider your decision.
The new block-style comments box is not hard to use; it’s just a little different!
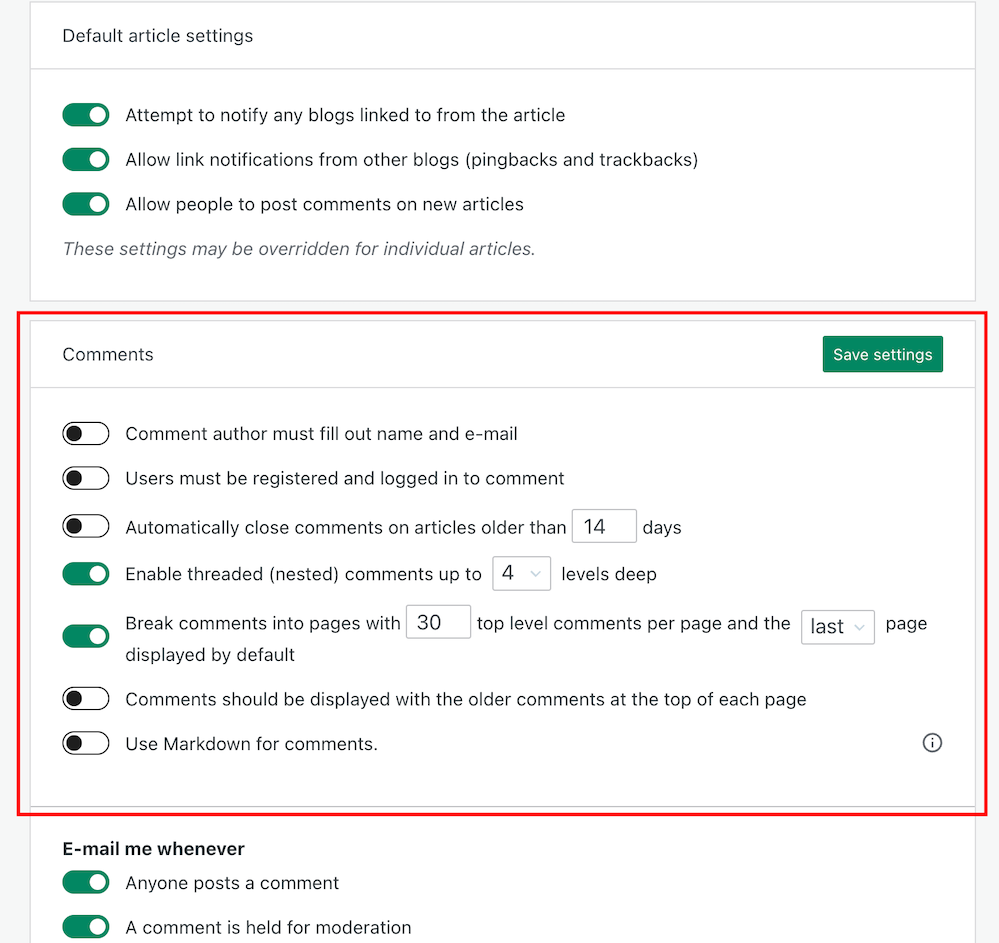
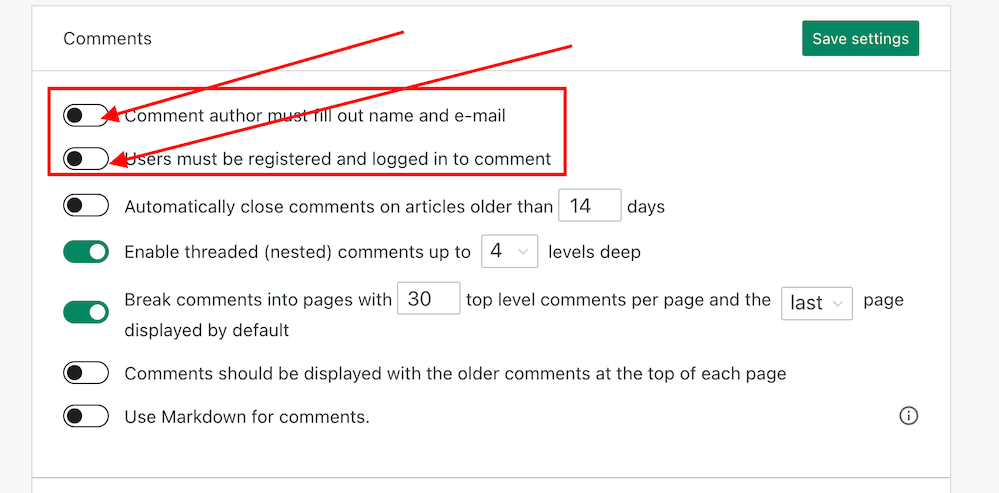
Update
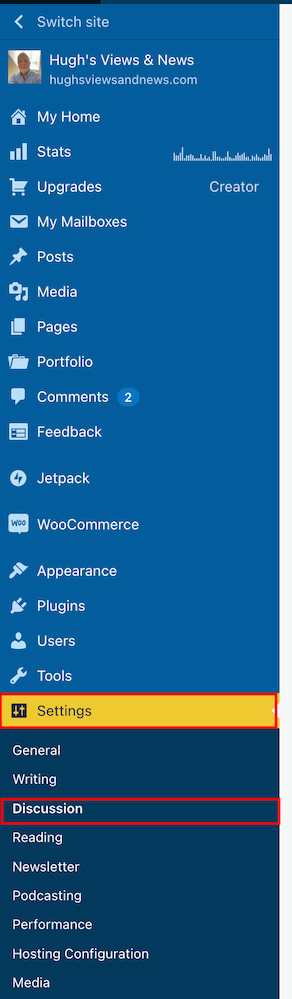
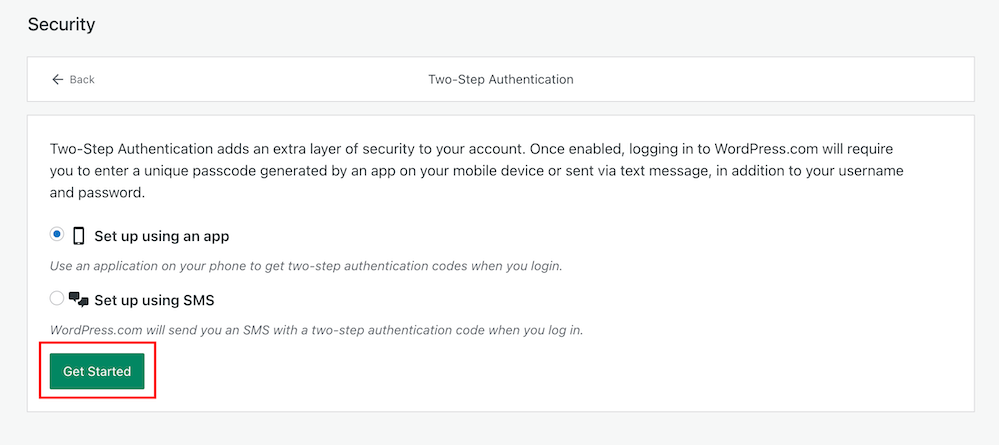
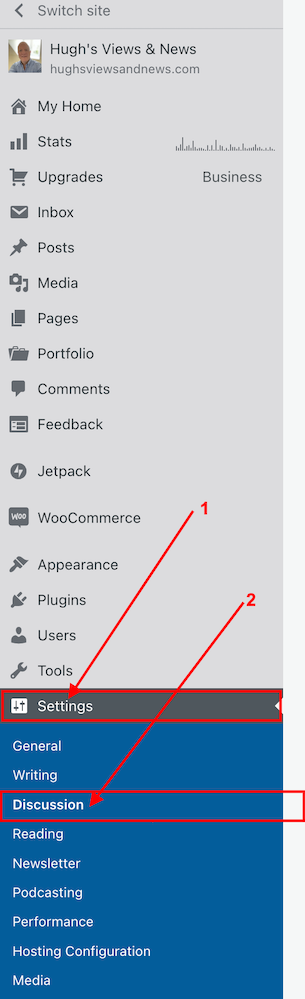
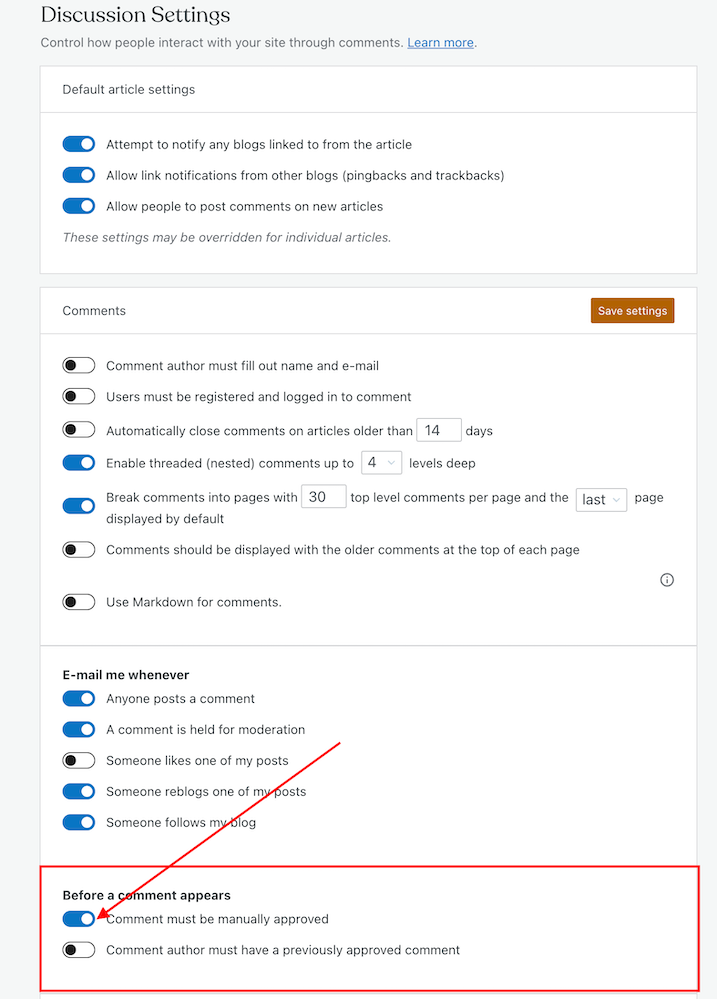
Users can now disable blocks in comments. Go to Settings – Discussions, and in the ‘Comments‘ section of the page, turn off ‘Enable blocks in comments.’ Remember to save the change.
WordPress’s new comments box style is a refreshing update that enhances the user experience. Its modern and intuitive design makes interacting with comments more enjoyable. If you have any questions about it, feel free to leave them in the comments section. I look forward to hearing your thoughts!
Layout, content, settings, and format might differ on self-hosted blogs.
Click the buttons below to follow Hugh on Social Media
Copyright @ 2024 hughsviewsandnews.com – All rights reserved.