Every day, our blogs come under attack from various elements.
Just like protecting our families, pets, and anything else we value, we should do all we can to protect our blogs from threats.
Threats come in all sorts of forms, but there are a few simple steps you can put in place to keep your blog safe.
1. Comments
What do you do if you receive unfriendly comments or comments that do not agree with what you have said in your blog post?
I’ve blogged for nearly ten years, and, in that time, I have received a handful of comments that were not only very personal but were rude, racist or homophobic.
Because I moderate all comments before they appear on my blog, I was able to stop these comments in their tracks. They were of the nature that did not call for a reply, and I simply marked them as spam and deleted them.
And it wasn’t only me that some of these unfriendly comments are aimed at.
I often see rude, unfriendly comments and spam appear on other blogs. Not only can they be shocking in their nature, but in many cases, the very name of the commenter can also be very offensive.
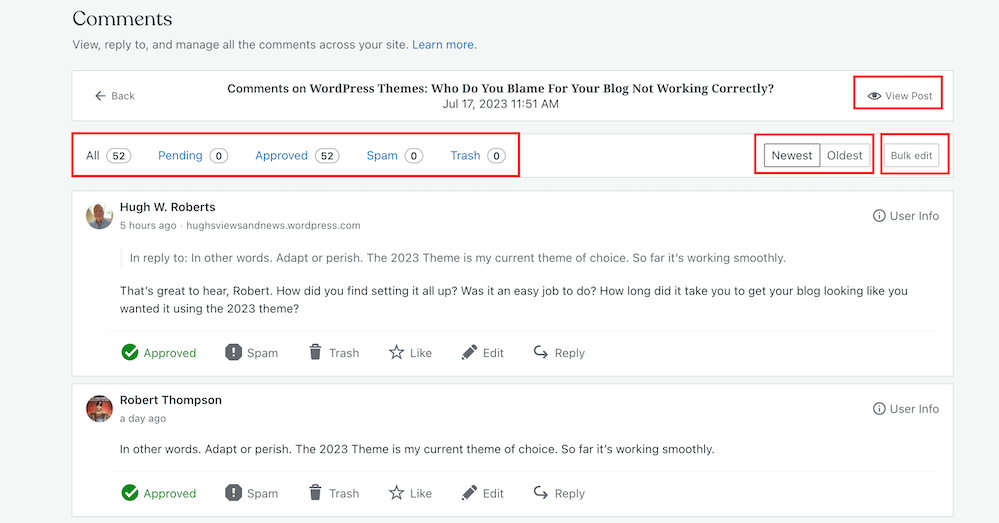
Unfortunately, Akismet, the WordPress software that blocks unwanted spam, doesn’t always catch all of it. So, monitoring all comments before they are published on your blog posts is worth considering.
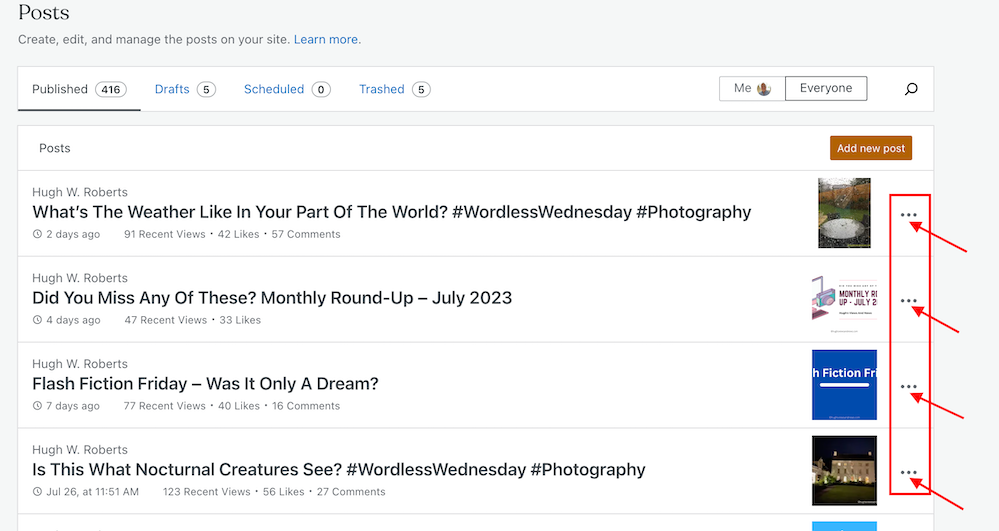
Follow these steps to set up monitoring comments.
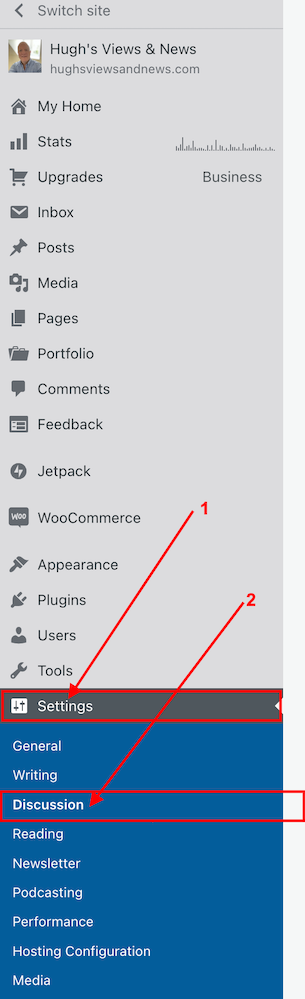
For the purpose of this post, instructions are via the ‘Default” view of your blog’s dashboard.
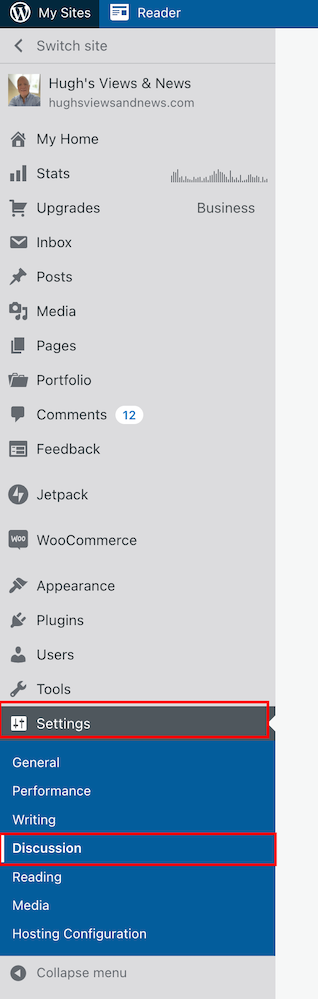
- Click Settings – Discussion on your blog’s dashboard.
- On the Discussion Settings page, scroll down to the ‘Before A Comment Appears‘ box and slide open the button next to ‘Comment must be manually approved.’
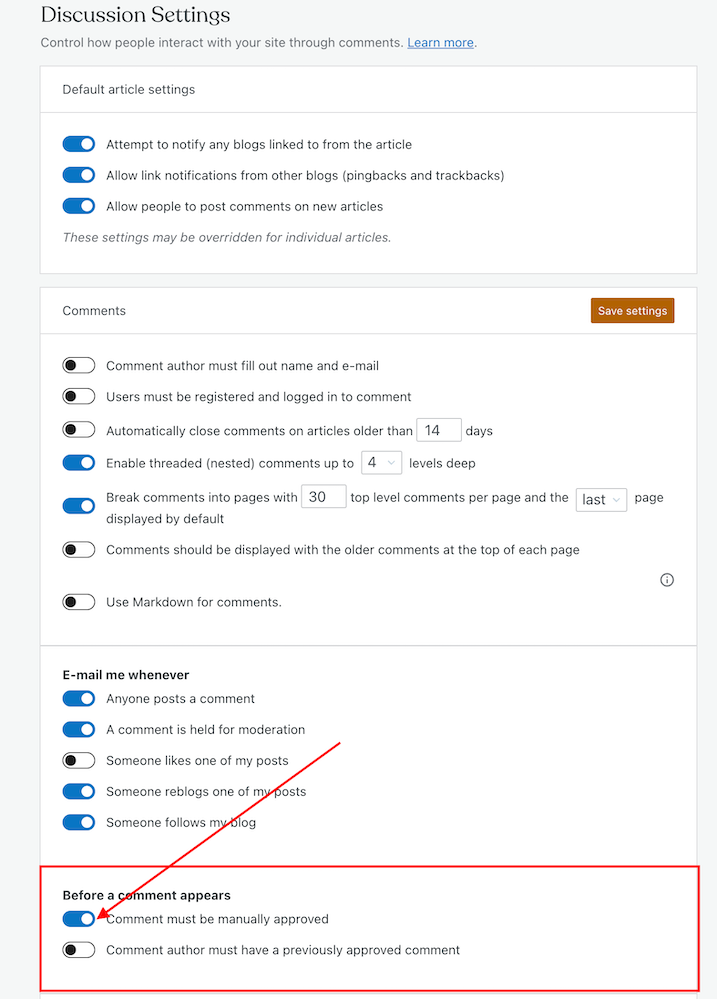
- Click on the ‘Save settings‘ button.
You may also have noticed an option to allow comments to be posted straight away from people who have previously had comments approved by you.
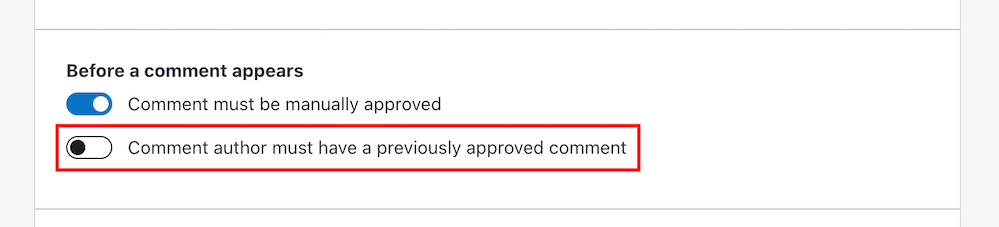
For bloggers who are dealing with hundreds of comments daily, this is a great time-saving option as you don’t need to manually approve them.
However, be wary. Somebody who may have left a perfectly friendly comment on an earlier post could also leave an unfriendly comment on a future one.
How to deal with people who don’t agree with you
Sometimes, I receive comments from people who may not agree with what I have to say, but that’s a part of the whole blogging experience.
However, providing their comment has been written in a friendly and professional manner, I will approve it.
Nobody should tolerate rudeness or bad manners, so don’t allow any of these kinds of comments to appear on your blog.
If comments are unfriendly, rude or make you feel threatened, mark them as spam.
Allowing unfriendly, rude comments to appear on your blog can make your blog look unfriendly and unwelcoming, especially to new visitors.
And consider removing anyone who leaves a rude comment, or one that threatens you or another blogger, from your subscriber list. My post ‘How To Spot And Remove Spammers And Spambots From Your WordPress Blog‘ gives full details.
Look after your fellow bloggers
If you see a rude comment or one that is spam on a blog you follow, inform the blog’s owner of the problem. They’ll probably thank you for looking out for them.
How to block certain bloggers or readers from leaving comments
Further down the same page on the Discussion Settings dashboard, you’ll see two boxes entitled ‘Comment Moderation‘ and ‘Disallowed comments.’

These boxes are where you can add certain words, the web address of a blog, the email address or the internet protocol of a user you want to block.
Comments will be held in a moderation queue if they contain anything you have added to the Comment Moderation box.
Comments will be sent to the trash bin if they match anything you have added to the Disallowed Comments box.
2. Internet trolls
If you are unlucky enough to find that an internet troll has decided to try and make your blog their new home, ignore them.
Whatever you do, don’t engage in any conversations with the internet troll. Whether through comments or if they try to contact you through your ‘contact me’ page, ignore them.
Internet trolls will do all they can to get you to react to what they have said. They may even try to get some of your readers to engage with them by responding to comments they have left, so never approve their comments.
Don’t give internet trolls the satisfaction of acknowledging them in any shape or form.
Remove any comments, and don’t allow them to upset you in any way. Add them to the ‘Disallowed Comments‘ box. They’ll soon get the message and move on.
3. Back-Up
How would you feel if you woke up one morning and found that all your blog content had disappeared?
It’s the stuff of nightmares, so be kind to your blog and make sure you back up its content regularly.
Depending on your WordPress plan, your blog can be backed up via Jetpack – Backup on your blog’s dashboard. If you don’t have this facility, consider saving all your blog posts via an external server or hard drive.
If you’re already writing your blog posts on Word, Pages or any other writing software such as Grammarly, ensure you save the documents on the iCloud (if you have access) or on another hard drive.
Don’t lose all your hard work by not backing up your blog.
4. Anti Virus Software
Always update anti-virus software on your device to protect your blog and ensure you have the latest version.
If hackers can get access to well-known websites, then they may be able to get access to your computer\device.
Malware could allow cybercriminals to take control of your computer, log your keystrokes, or access your personal information and financial data, which could lead to identity theft. So, not only could your blog be at risk from hackers, but so could your bank details and other personal information.
Remember to keep all other software on your computer up to date and use the latest software versions of any website you visit regularly.
WordPress.Com users will always have the latest version of WordPress as WordPress download updates directly. Those who have self-hosted blogs should ensure they have the latest updates installed.
This all may sound nightmarish, and you may ask yourself who would want to attack your blog, but every blogger should take it seriously. Don’t become a victim.
However, whatever you do, keep enjoying your blogging experience.
Although attacks on our blogs are happening constantly, your anti-virus software (and the software supplied by WordPress) deals with most threats without you knowing about it.
Let’s Wrap It Up.
- Make sure you protect your blog from any online attacks.
- Don’t approve any comments that are unfriendly, rude, or racist towards you or any other bloggers.
- Consider moderating all comments before they appear on your blog.
- People may disagree with what you say in your posts. Only approve their comments if they’ve been written in a friendly and professional manner.
- Unsubscribe and or/block trolls and unfriendly readers from your blog.
- Never respond to comments from trolls or allow their comments to appear on your blog.
- Remember to regularly back up your blog or save your blog posts on an external hard drive.
- Keep anti-virus software updated on your devices.
- Ensure you’re using the latest version and tools of WordPress.
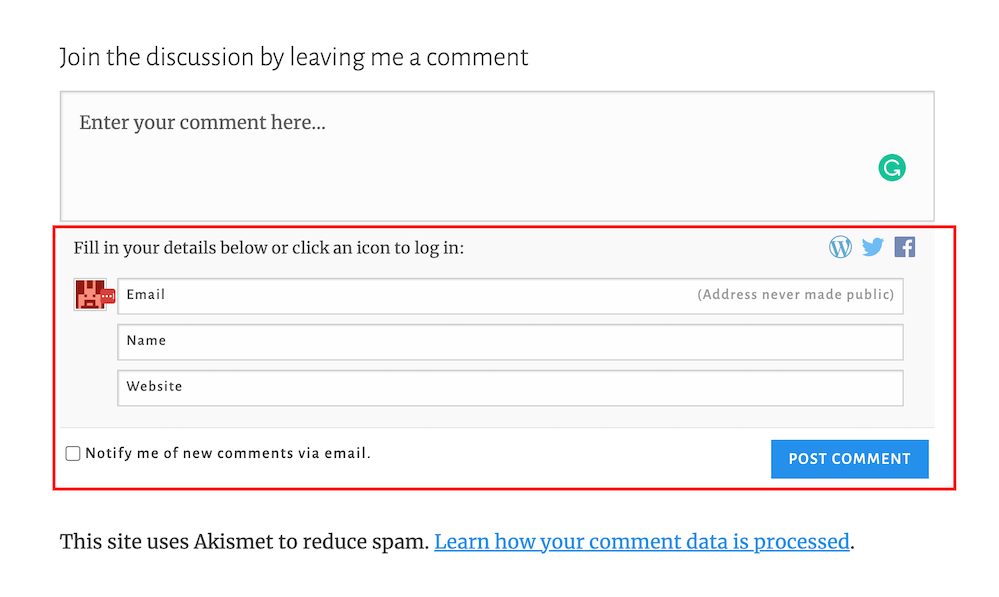
Is there anything else you’d like to share with us about protecting your blog from unwanted attention and attacks? Do you have any questions? Join the discussion by leaving me a comment with the details.
Layout, content, settings, and format might differ on self-hosted blogs.
Follow Hugh on Social Media. Click on the links below.
If you enjoyed this post and want more like it, enter your email address and click ‘Subscribe’ to stay up-to-date with my latest content.
Copyright @ 2024 hughsviewsandnews.com – All rights reserved.