Are there easy ways to promote your old blog posts, and should you feature them on your blog again?
Can old blog posts bring in more visitors, followers and comments?
The answer is YES.
One of the biggest mistakes many bloggers make is forgetting their old blog posts. They publish posts and quickly forget about them.
Yet, If they’ve been regularly publishing blog posts, their blog archive will be a treasure trove of opportunities waiting for them to bring posts alive again. Just think about all those followers, readers and visitors who have never seen those posts.
Rather than ignoring these old blog posts, there are ways to bring them back to the attention of your audience.
These old blog posts probably never got anywhere near as many views and comments as your recent blog posts, but did you know that they could quickly bring you many more views, comments and followers?
My three quick and easy tips for bringing these old blog posts back to life are easy to follow and will deliver results as soon as you implement them.
1. Display ‘related’ posts at the end of all your blog posts.
I’m always surprised by how many WordPress bloggers don’t have this feature switched on.
Here’s a screenshot of the related posts that featured at the end of one of my recent blog posts.
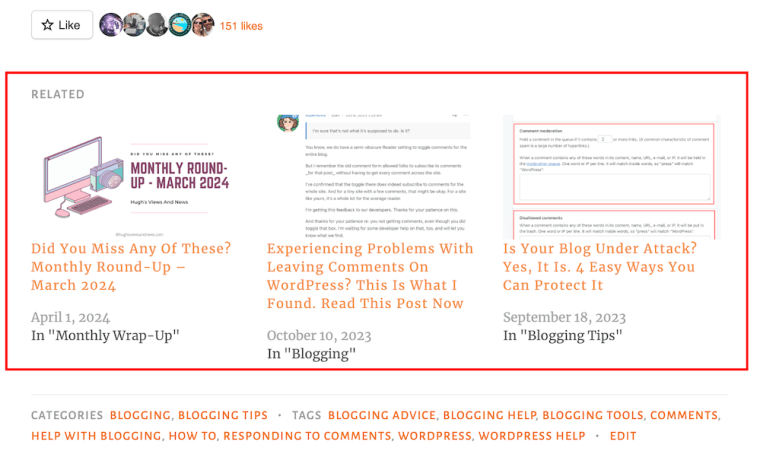
WordPress automatically chooses which of your posts to display.
If you’re not already showing related blog posts at the end of newly published blog posts, follow this guide.
- On the dashboard of your blog, click on Settings and Reading.
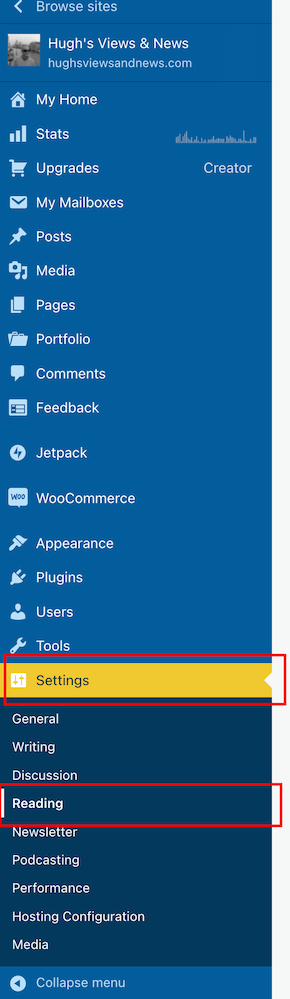
- On the Reading Settings page, look for Related Posts and ensure ‘Show Related Content After Posts’ is switched on.
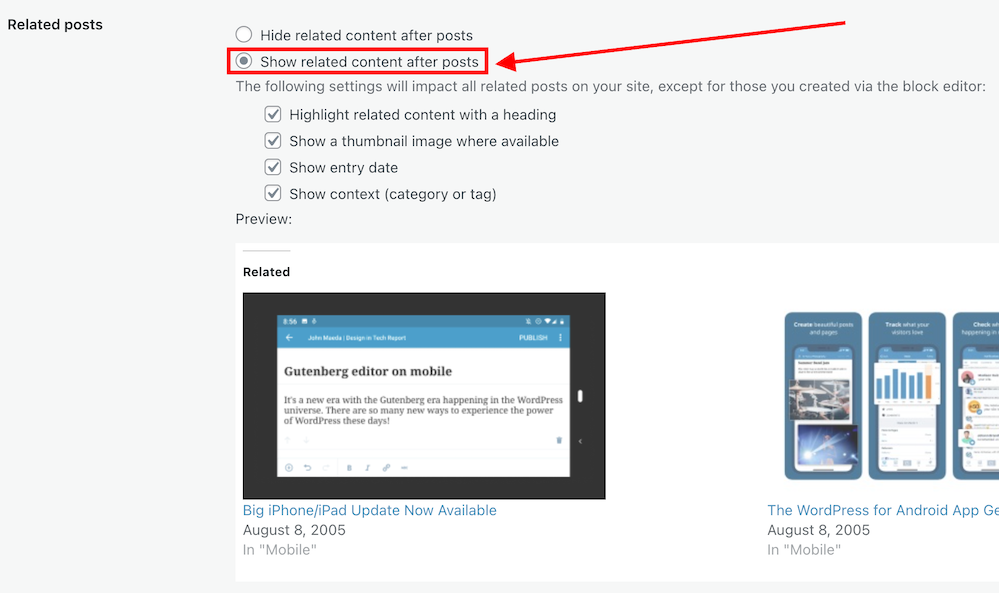
- Choose which other settings options you want to use.

- At the bottom of the screen, click on the Save Changes button.
- Future posts will now display three related posts from your archives, resulting in those posts being seen again.
2. The ‘Blog Posts’ Block
Those using the Block Editor can use a terrific block called the’ Blog Posts’ block. It allows bloggers to choose which of their previous blog posts to promote on newly published posts.
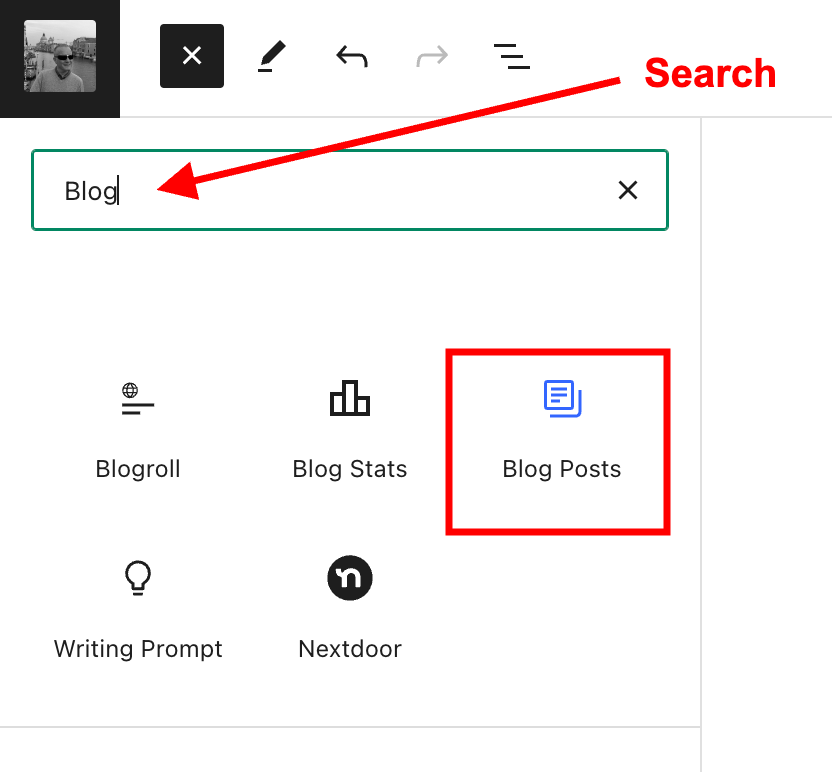
- Insert the ‘Blog Posts’ block in the place where you’d like to feature it on your upcoming new post. You’ll find the ‘Blog Posts’ block under the ‘Widgets’ section, or you can search for it by entering ‘Blog Posts’ in the search bar.
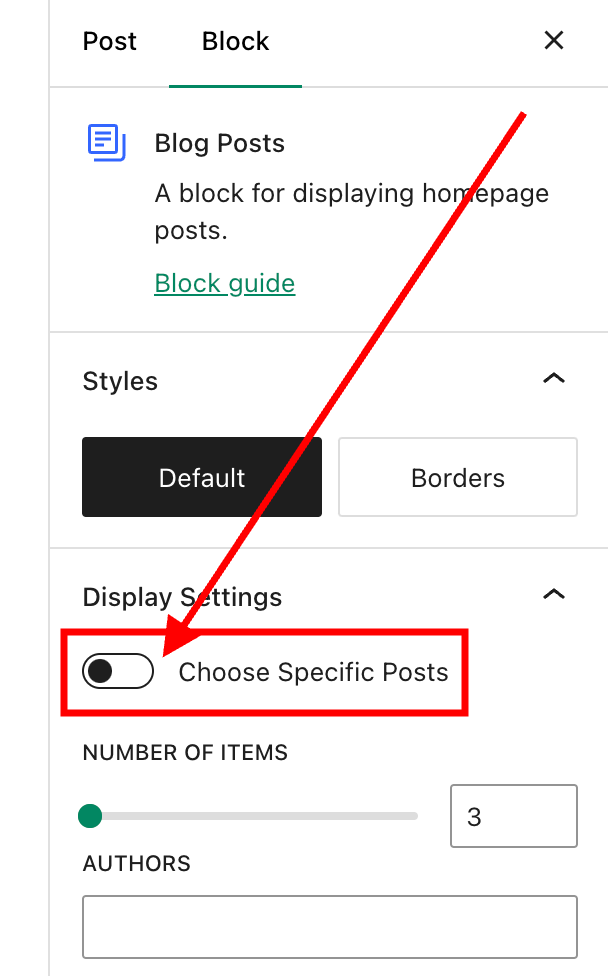
- The Blog Posts block defaults to showing the last three blog posts you published, but you can change this. You can leave it as it is or switch to other settings.
- Today, I will show you how to choose the blog posts you want to display.
- When you insert the block, a toolbar will open on the right-hand side of the page. Under Display Settings, look for Choose specific posts and slide the button to the ‘on‘ position.
- In the ‘Posts‘ box, type in the blog post title you want to display. As you type, suggestions for blog posts with the words you are using will appear.
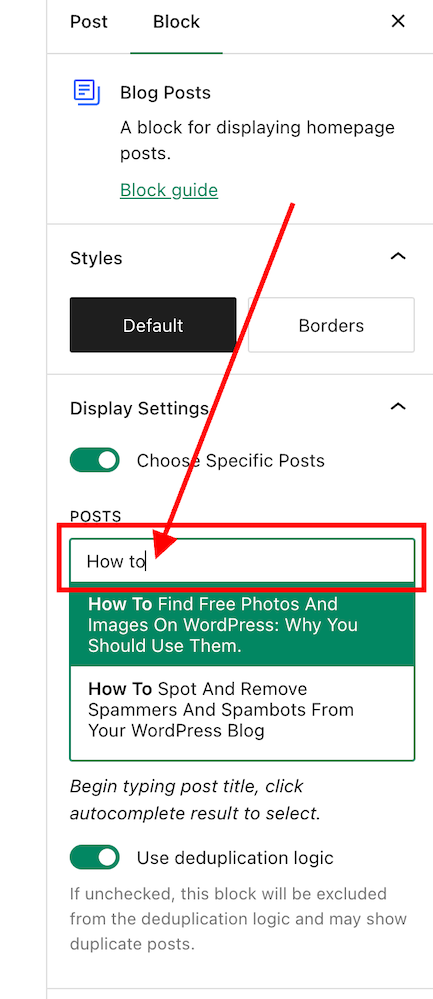
- Select the blog post you want to feature.
- If you’re going to add more blog posts, search for them by typing in more words in the Posts box.
- I recommend that you add no more than three posts.
- The Blog Posts block has many other settings, which you can read about here.
3. Add pingbacks to previous blog posts.
If you’re unsure what a pingback is or how to add it to blog posts, my post, ‘The Power Of Pingbacks: How To Create One,’ will help.
There’s nothing wrong with adding pingbacks and linking back to your previous blog posts. Lots of bloggers do it.
In fact, I recommend that you include at least a couple of pingbacks in all your blog posts. However, you should always ensure that what you’re writing about is connected to the post you’re linking back to.
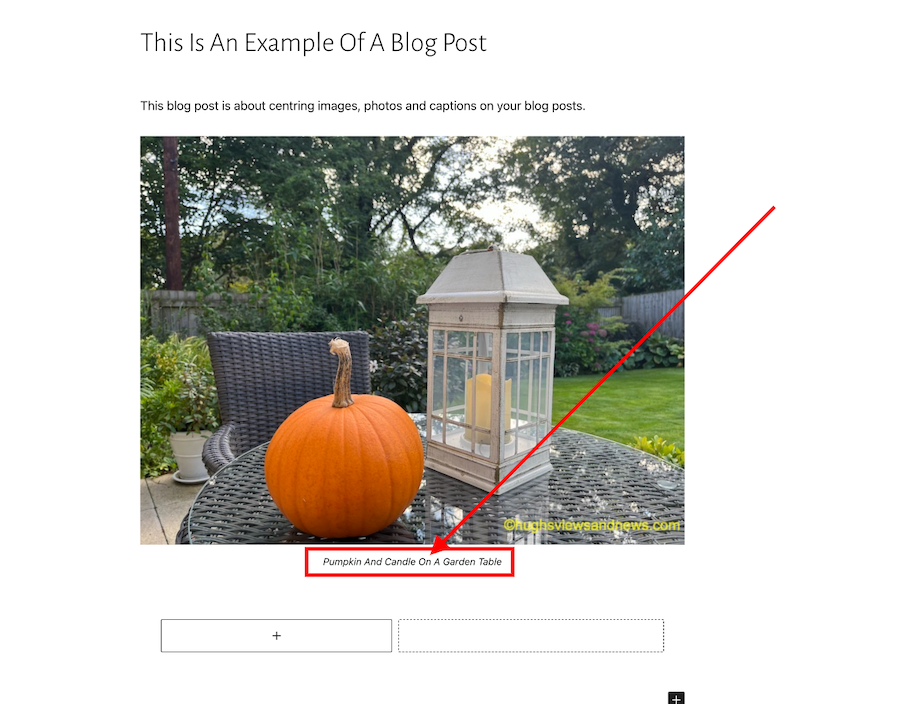
Pingbacks can also be added to images, pictures, and photos in blog posts and captions.
Let’s wrap it up!
- Your blog’s archives are a treasure trove of blog posts that can attract new visitors, comments, and followers.
- Don’t allow old blog posts to remain idle and not work for you. Use them.
- Your previous blog posts may not have been read by new followers. Introduce them to your new audience.
- People who may have read your older posts are often thankful for the opportunity to read them again, especially if the post includes tips and advice.
- Ensure you keep old blog posts up to date.
- WordPress has made several blocks available on the Block editor to promote old blog posts. The ‘Blog Posts’ block is just one of those blocks.
- Consider switching it on if you’re not already using the ‘Related Posts’ feature.
- Remember that you can create pingbacks to old blog posts from any images or photos in future blog posts.
Do you promote your old blog posts? If not, why not? How do you promote them? What way(s) of promoting old blog posts have worked best for you? Have you had much success promoting old blog posts?
Did you enjoy reading this post? Then you may also like…
The Amazing New WordPress Comments Box: What It Does
WordPress has introduced a new block-style comment box that aligns with the Block editor. But what can users do with it besides leaving comments?
Are some bloggers really refusing to use it and threatening to leave WordPress?
My post contains all the details you need.
Is Your Blog Safe? One Security Feature You Must Have
Are you doing everything you can to protect your blog?
This is one security feature I recommend every blogger have. And it’s easy to set up.
Exploring Multiple Avenues: How to Contact WordPress for Support: 6 Best Ways
What’s your experience of dealing with WordPress?
Are you experiencing problems with WordPress? Have you reported the problems to them? If not, why not?
The 6 best ways to contact WordPress.
Any questions about this post? Leave them in the comments box.
Layout, content, settings, and format might differ on self-hosted blogs.
Follow Hugh on social media. Click the buttons below.
Copyright @ 2024 hughsviewsandnews.com – All rights reserved.